Required security profile permissions: Custom Report Headers Edit or Create
You can optionally create a custom report header to include at the top of custom reports. Headers can include a logo, the name of the report, the date range of the data presented in the report, the filters applied to the data, and other filters. You have the option to modify headers after their creation.
Create a Custom Report Header
-
-
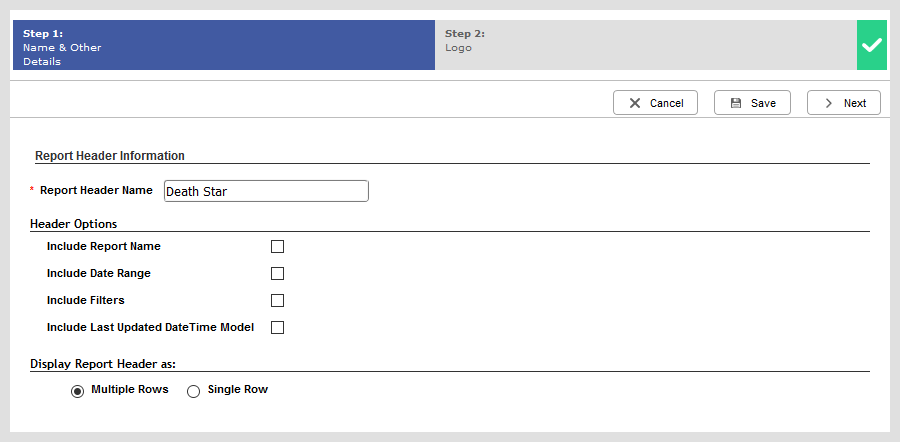
If you are creating a new custom report header, click Create New.
-
Give the header a unique Report Header Name.
-
Select the data you would like to include, which can be any combination of Include Report Name, Include Date Range, Include Filters, and Include Last Updated DateTime Model.
-
Specify whether you want the header to span Multiple Rows or a Single Row.
-
Click Next if you want to add a logo, or click Save if you do not want to add a logo.
-
 (OPTIONAL) Add a logo to the header.
-
Select either Upload New or Select Existing to specify the method you want to use to select a logo.
-
Click Choose File or Browse to open a new window that enables you to select an image file for your logo from your computer or from the environment, respectively. Click Open or OK.
- Click Save.
-
-
(OPTIONAL) If you want to write any special notes about the header, click the Notes tab, then click Edit. Write the notes in the text box and click Done.
-
Edit a Custom Report Header
-
-
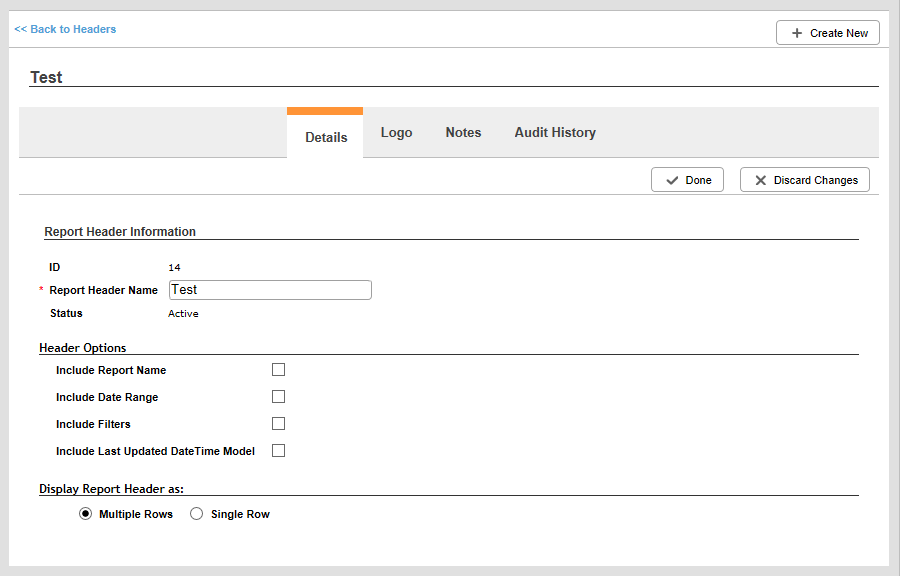
Use the page links on the bottom of the headers table, or the search feature at the top, to locate the header you want to edit. Click the header to open it. Click Edit.
-
Give the header a unique Report Header Name.
-
Select the data you would like to include, which can be any combination of Include Report Name, Include Date Range, Include Filters, and Include Last Updated DateTime Model.
-
Specify whether you want the header to span Multiple Rows or a Single Row.
-
Click Done or Discard Changes.
-
(OPTIONAL) Add a logo to the header or change the existing header logo.
- Click the Logo tab. Click Edit. If you want to remove the current logo without replacing it, click Remove instead.
-
Select either Upload New or Select Existing to specify the method you want to use to select a logo.
-
Click Choose File or Browse to open a new window that enables you to select an image file for your logo from your computer or from the environment, respectively. Click Open or OK.
- Click Done.
-
(OPTIONAL) If you want to write any special notes about the header, click the Notes tab, then click Edit. Write the notes in the text box and click Done.
-


