Required security profile permissions: Skills Create
You can upload multiple skillsClassification used to facilitate the delivery of contacts; assigned to agents based on abilities, specialties, and knowledge at the same time either to create new skills or to modify existing ones. If you use the bulk upload tool to modify existing skills, it is a best practice to use the Row Changed column in the file where you indicate which skills changed. Otherwise, the platform considers all rows to be updated and takes much longer to upload the file.
Create Multiple Skills
-
Click Routing → Skills.
-
Click Create New → Manage Multiple Skills.
-
Click Download Template.
-
Open the file in either Excel or Notepad.
-
In the rows below the header and explanation rows, fill in the information about each record. See Template Rows for information about each column. Do not modify the column names, order, or data format.
-
Save the file.
-
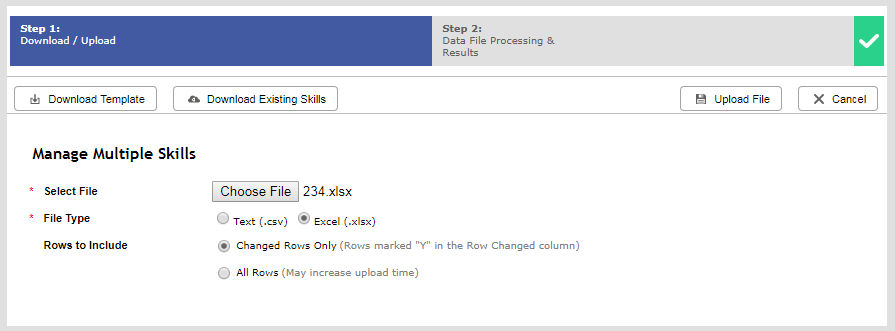
In the Select File field of the Manage Multiple Records modal, click Choose File.
-
Browse for the file you created. Select it and click Open.
-
Select the File Type corresponding with the file you chose.
-
Select All Rows for Rows to Include.
-
Click Upload File.
-
The Data File Processing & Results page displays a note that you should receive the results of the upload via email. Check your email to verify that no errors occurred during the upload. Resolve any errors that appear. To resolve an error, you would fix the issue in the file you uploaded, then click Back and re-upload it. If you have no errors, click Close.
If the email indicates that the batch failed, you can find details about the processing of the batch files under the Schedule Run History Report Report.
Edit Multiple Skills
-
Click Routing → Skills.
-
Click Create New → Manage Multiple Skills.
-
Click Download Existing Skills.
-
Open the file in either Excel or Notepad.
-
In the rows below the header and explanation rows, fill in the information about each record. Do not modify the column names, order, or data format.
-
Save the file.
-
In the Select File field of the Manage Multiple Records modal, click Choose File.
-
Browse for the file you created. Select it and click Open.
-
Select the File Type corresponding with the file you chose.
-
If you chose not to use the Row Changed column, select All Rows for Rows to Include. If you used the Row Changed column, select Changed Rows Only.
-
Click Upload File.
-
When the Data File Processing & Results page displays a note that you should receive the results of the upload via email, check your email to verify that no errors occurred during the upload. Resolve any errors that appear. To resolve an error, you would fix the issue in the file you uploaded, then click Back and re-upload it. If you have no errors, click Close.
If the email indicates that the batch failed, you can find details about the processing of the batch files under the Schedule Run History Report Report.


