Manage Contacts
The CXone Softphone contacts feature allows you to enter and sort contacts in the application. The contacts are for reference only. You cannot dial contacts from CXone Softphone; you must dial them from MAX.
In addition to creating contacts, you can create organizational groups for your contacts. Default groups include Family, Friends, and Work. You can hide groups if you want all contacts to appear together. If you need to make the contact list separate from the rest of CXone Softphone, you can pop it out into a separate window.
Create a Contact

- Click Contacts → Add Contact. The Contact Profile window opens.
- (OPTIONAL) To add a picture of the contact, click the profile image drop-down in the top left corner. Click Change. Browse your computer for the image you want to associate with the image and click Open. To remove the image, click the profile image drop-down and click Reset.
- Click the Group drop-down. Select the checkbox of each group where you want to assign the contact. The defaults include Family, Friends, and Work, but the drop-down also includes groups you have created.
- Click the Softphone drop-down and select the type of contact information you want to add for the contact. Type the contact's phone number, email address, website, or other information you selected in the text box to the right of the drop-down. Click Add. Repeat this step for each type of contact information you want to add for the contact.
- (OPTIONAL) If you added multiple phone numbers for the contact, select a default number to dial for this contact from the Primary phone number field.
- (OPTIONAL) To remove contact information from the contact, select it from the list of contact information and click Remove.
- Type a Display name for the contact. Optionally type the contact's First name and Last name in the corresponding fields.
- Click OK.
Edit a Contact
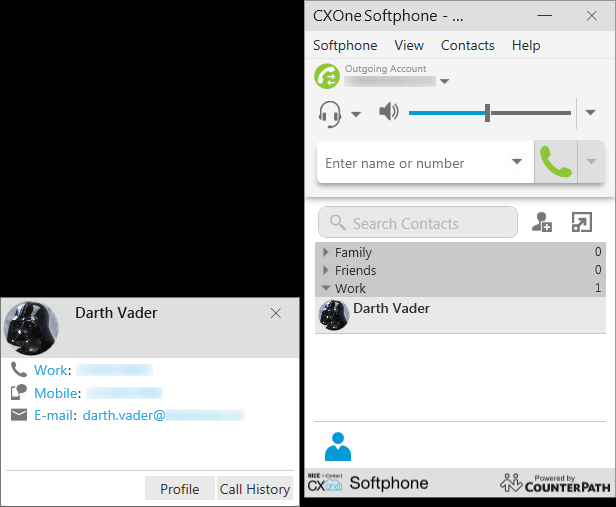
- Click the contact icon on the bottom of CXone Softphone. If it is unavailable, first click View → Show Contacts.
- Locate the contact you want to edit. Click the contact to open details. In the details window, click Profile.
- (OPTIONAL) To change the picture associated with the contact, click the profile image drop-down in the top left corner. Click Change. Browse your computer for the image you want to associate with the image and click Open. To remove the image, click the profile image drop-down and click Reset.
- (OPTIONAL) To change the groups assigned to the contact, click the Group drop-down. Select the checkbox of each group where you want to assign the contact and clear the checkbox of each group you want to unassign the contact. The default options include Family, Friends, and Work, but the drop-down also includes groups you have created.
-
(OPTIONAL) To remove contact information from the contact, select it from the list of contact information and click Remove.
- (OPTIONAL) To add more contact methods to the contact, click the Softphone drop-down and select the type of contact information you want to add for the contact. Type the contact's phone number, email address, website, or other information you selected in the text box to the right of the drop-down. Click Add. Repeat this step for each type of contact information you want to add for the contact. To modify contact information, you must remove the existing information and add it again.
- (OPTIONAL) If you added multiple phone numbers for the contact, select a default number to dial for this contact from the Primary phone number field.
- (OPTIONAL) Modify the Display name for the contact. Optionally type the contact's First name and Last name in the corresponding fields.
- Click OK.
Delete a Contact
- Click the contact icon on the bottom of CXone Softphone. If it is unavailable, first click View → Show Contacts.
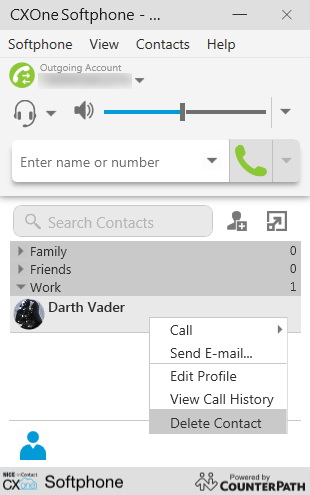
- Locate the contact you want to delete. Right-click the contact and click Delete Contact.
Create a Contact Group
- Click Contacts → New Group.
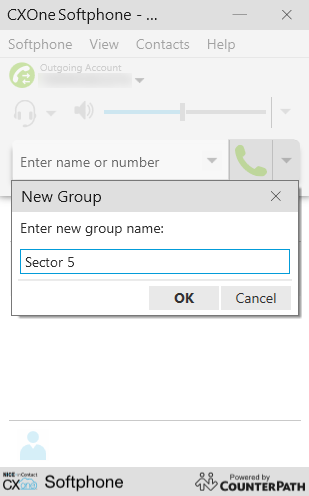
- Type a name for the new group in the New Group window.
- Click OK.
- Add contacts to the group. To do so, create a new contact or modify an existing one as described in the preceding tasks. Click the Group drop-down and select the checkbox of the new group. Click OK.
Delete a Contact Group
- Click the contact icon on the bottom of CXone Softphone. If it is unavailable, first click View → Show Contacts.
- Locate the group you want to delete. If you do not see groups, click Contacts → Show Groups.
- Open the group. If the group contains contacts that you do not want to delete, edit those contacts to belong to other groups as described in the preceding Edit a Contact task.
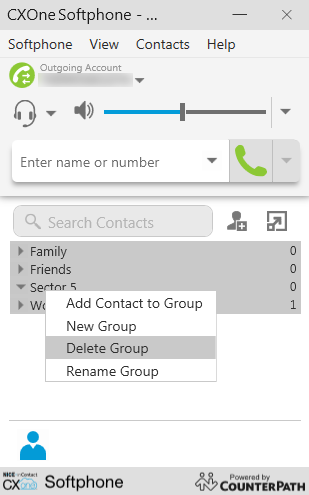
- Right-click the group and click Delete Group. If any contacts remain in the group, a confirmation window appears that asks if you want to delete the group and all its contacts. If you are sure you want to delete it all, click Yes. If the contacts belong to other groups, they will still exist under those groups; those contacts are not completely deleted.


