NICE inContact Co-browse and Advanced Chat Overview
Use the Customer Engagement Panel in NICE inContact Co-browse and Advanced Chat to interact dynamically with customers, initiate a co-browsing session, or share information.
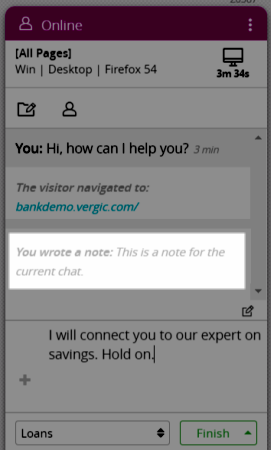
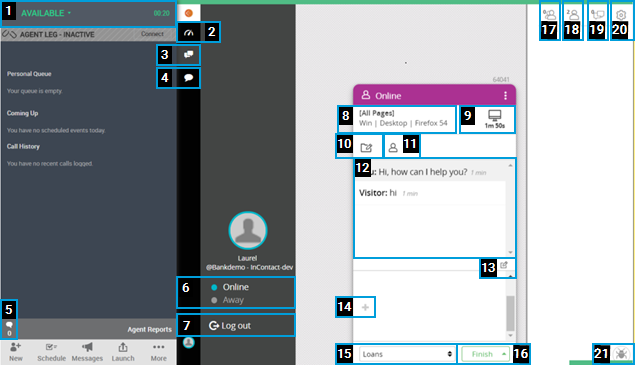
The NICE inContact Co-browse and Advanced Chat Interface
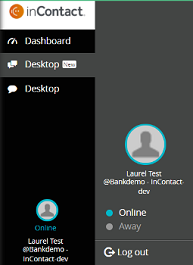
1—Availability State
Displays your current availability state in the MAX application. To change your state, click and select a new state from the drop-down list.
 2—Dashboard
Click to view an overview of your personal stats, as well as a current view of your group's status.
2—Dashboard
Click to view an overview of your personal stats, as well as a current view of your group's status.
 3—Desktop
Consists of three sections:
4—Desktop
Offers the same information and accessibility as the previous; however, the Queue menu functions as a slide-out menu. It also specifies which contacts result from a visitor clicking a banner to begin a chat session and which have entered the queue by way of proactive chat, if your company has implemented it.
3—Desktop
Consists of three sections:
4—Desktop
Offers the same information and accessibility as the previous; however, the Queue menu functions as a slide-out menu. It also specifies which contacts result from a visitor clicking a banner to begin a chat session and which have entered the queue by way of proactive chat, if your company has implemented it.
 5—Visitors
Displays the number of visitors awaiting a dialogue.
6—Status
Your current Customer Engagement Panel status. If you set your status to Away in the Customer Engagement Panel, you will still be available for new phone and email contacts if your MAX agent state is set to Available.
7—Log Out
Click to log out of the chat interface.
8—Information
Includes information about the visitor's operating system, device type, and browser.
9—Chat Duration
Length of time since the current chat began.
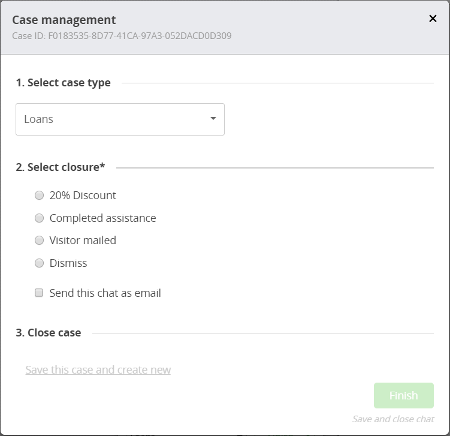
10—Case Management
Click to change the case type, assign a closure, and close the case.
5—Visitors
Displays the number of visitors awaiting a dialogue.
6—Status
Your current Customer Engagement Panel status. If you set your status to Away in the Customer Engagement Panel, you will still be available for new phone and email contacts if your MAX agent state is set to Available.
7—Log Out
Click to log out of the chat interface.
8—Information
Includes information about the visitor's operating system, device type, and browser.
9—Chat Duration
Length of time since the current chat began.
10—Case Management
Click to change the case type, assign a closure, and close the case.
 11—Visitor Information
Displays visitor information, when available.
12—Text Box
Displays the text of the current chat.
13—Notes
Click to add internal notes to the current chat.
11—Visitor Information
Displays visitor information, when available.
12—Text Box
Displays the text of the current chat.
13—Notes
Click to add internal notes to the current chat.
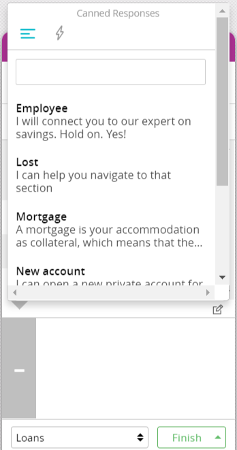
 14—Canned Responses
Click to select a canned response or a link to available documents. Canned responses can be edited before being sent.
14—Canned Responses
Click to select a canned response or a link to available documents. Canned responses can be edited before being sent.
 15—Case Types
Click to view and select available case types. To see more case management options, click More options.
16—Finish
Click to complete the case management for the current chat.
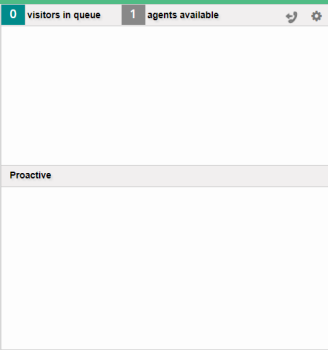
17—Dialogue Queue
Number of visitors awaiting a dialogue.
18—Agents
Number of agents who are logged in.
19—Ongoing Chats
Number of current ongoing chat contacts.
20—Queue Options
Click to view queue options.
15—Case Types
Click to view and select available case types. To see more case management options, click More options.
16—Finish
Click to complete the case management for the current chat.
17—Dialogue Queue
Number of visitors awaiting a dialogue.
18—Agents
Number of agents who are logged in.
19—Ongoing Chats
Number of current ongoing chat contacts.
20—Queue Options
Click to view queue options.
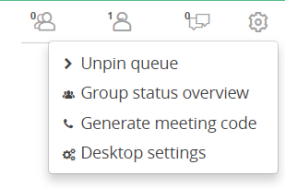
- Unpin queue—Removes the static quality of the Queue menu, which becomes a slide-out menu
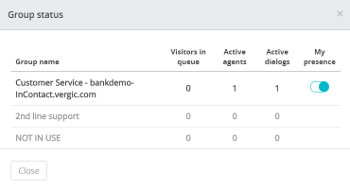
- Group status overview—Provides a breakdown of the current group status
- Generate meeting code—Generates a code to initiate a co-browse session with a visitor who is not yet engaged in a chat
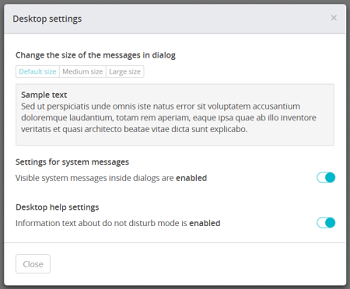
- Desktop settings—Change chat font size, and message notification settings
21—Software Issues
Report software issues by creating a debug file.
Co-browsing Functions
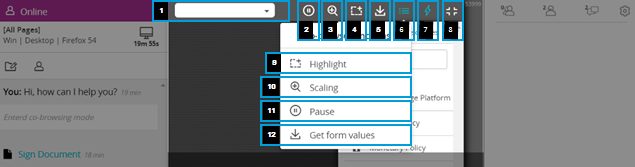
1—URL
Displays the URL of the page the visitor is viewing.
2—Pause
Click to pause the page navigation. The visitor may continue to navigate, but you will remain where you paused until you un-pause.
3—Zoom
Report software issues by creating a debug file.
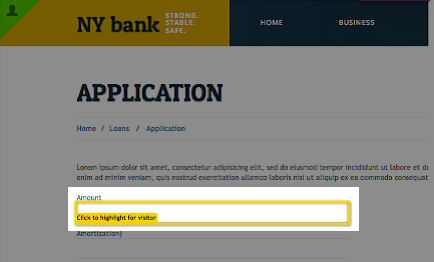
4—Highlight
Click to highlight and draw attention to specific portions of the page.
5—Get Form Values
Click to update the page to display the values the visitor has entered.
6—Display Names
Click to display names of the co-browsing functions.
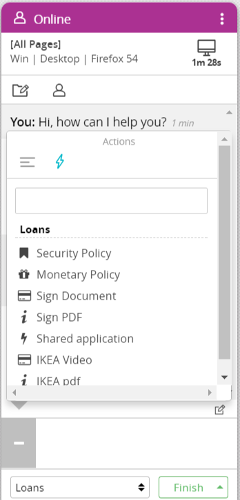
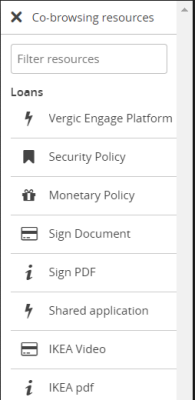
7—Shortcuts
Click to view a list of available shortcuts, such as forms and articles.
 8—Exit Co-browsing Mode
Click to exit the co-browsing mode. The chat window will remain until the chat is close
9—Highlight
Click to highlight and draw attention to specific portions of the page.
10—Scaling
Click to zoom in or out on the page on which you are co-browsing.
11—Pause
Click to pause the page navigation. The visitor may continue to navigate, but you will remain where you paused until you un-pause.
12—Get Form Values
Click to update the page to display the values the visitor has entered.
8—Exit Co-browsing Mode
Click to exit the co-browsing mode. The chat window will remain until the chat is close
9—Highlight
Click to highlight and draw attention to specific portions of the page.
10—Scaling
Click to zoom in or out on the page on which you are co-browsing.
11—Pause
Click to pause the page navigation. The visitor may continue to navigate, but you will remain where you paused until you un-pause.
12—Get Form Values
Click to update the page to display the values the visitor has entered.
 →
→