Create Coaching Forms
- Click ClearVoice → Coaching Forms.
- Click the Add icon (indicated by a plus sign in a blue circle) in the upper right corner of the forms page.
- Type a Name for the form.
- (OPTIONAL) Type a Description for the form. This value appears to the right of the forms drop-down list when the form is selected.
- Click Create.
-
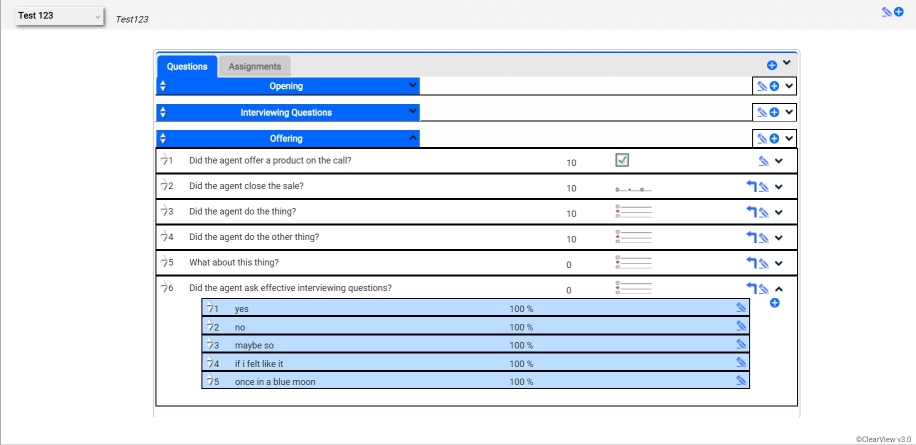
 Add a sub-form.
- Click the Add icon in the upper right corner of the form.
- Type a Name for the sub-form.
- (OPTIONAL) Type a Description for the sub-form. This value appears in a tool-tip when you hover over the sub-form name.
- (OPTIONAL) Type a numeric value in Position. This value determines the order of the sub-forms on the form. Leaving this field blank places the sub-form in the next available position.
- Select the Used checkbox to make the sub-form visible. If you want to hide the sub-form, leave the checkbox cleared.
- Select the Global checkbox to make this sub-form available to other forms. Global sub-forms are indicated by a globe icon when shown on a coaching form.
- Click Use Global to select from a list of existing sub-forms you can use.
- Click Create.
- Repeat this step and the next two until you are finished adding sub-forms, questions, and answers to the form.
-
Add a question.
- Click the Add icon in the upper right corner of the sub-form.
- Type a Name for the question. This value appears as the question on the form.
- (OPTIONAL) Type a Description for the question. This value appears in a tool-tip when you hover over the question on the form.
- Type a numeric value in Weight. You can use weight values to place a higher value on specific questions, thus influencing the final score. Best practice would be to assign all standard questions a weight of 1, and then give a higher number to higher-priority questions.
- (OPTIONAL) Type a numeric value in Position. This value determines the order of the questions on the sub-form. Leaving this field blank will place the question in the next available position.
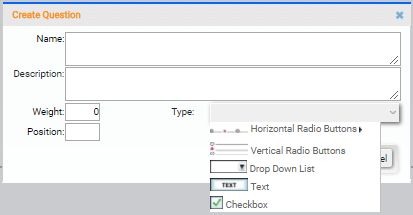
- Select a question Type from the drop-down list. The question type determines how the question can be answered. The following question types are available:
- Horizontal Radio Buttons — Provides radio buttons in a horizontal line. Select from pre-populated values of Yes/No or Yes/No/NA, or select Blank to configure custom answers.
- Vertical Radio Buttons — Provides radio buttons in a vertical line using the answers you configure.
- Drop Down List — Provides a drop-down list using answers you configure.
- Text — Provides a field for free text entry.
- Checkbox — Provides a checkbox with the default value of selected.
- Click Create.
- (OPTIONAL) If the question should be dependent on the question preceding it, click the right-angle arrow icon to the right of the question (see the image at the beginning of the View and Edit Coaching Forms section).
- Repeat this step and the next one until you are finished adding questions and answers to the sub-form.
-
Add an answer.
- Click the Assignments tab.
- Click the Expand/Collapse icon (indicated by an angle bracket) to the right of the Edit icon for a question.
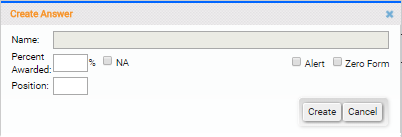
- Type a Name for the answer. This value appears as the answer on the form.
- (OPTIONAL) Type a numeric value in Percent Awarded if the form should result in a score. If the form is not to be scored, select the NA checkbox.
- (OPTIONAL) Type a numeric value in Position. Type a numeric value in Position. This value determines the order of the answers for the question. Leaving this field blank will place the answer in the next available position.
- (OPTIONAL) Select the Alert checkbox. When this field is checked, and this answer is selected, an alert is sent to the agent's supervisor.
- (OPTIONAL) Select the Zero Form checkbox. When this field is checked, and this answer is selected, the agent receives a score of 0 for the form.
- Click Create.
- Repeat this step until you are finished adding answers for the question.
-
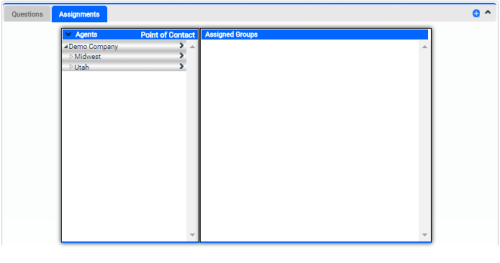
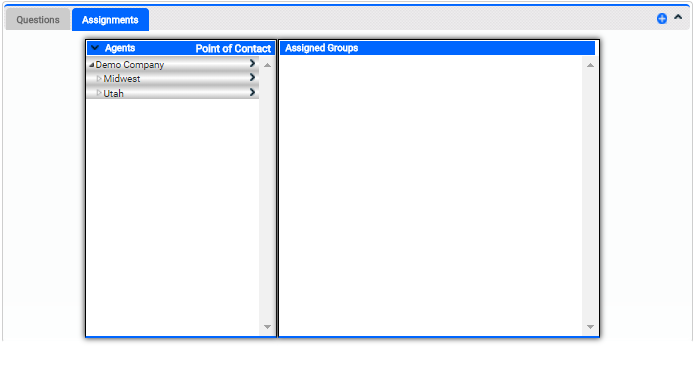
Assign the form to agents or groups.
- Click the Assignments tab.
- Click the black arrow to the left of Agents in the left section to expand all, or click the white arrow to the left of a group and drill down level-by-level to locate the agent or group for the form assignment.
- (OPTIONAL) To assign a form based on points of contact instead of agent or group, click Points of Contact in the left section and then use the methods described in the previous step to locate the point of contact for the form assignment.
- Click the black arrow to the right of the group or agent for the form assignment to move it to the right section under Assigned Groups.
- To remove an entity from the Assigned Group section, click the Delete icon (indicated by a minus sign in a blue circle) to the right of the entity.