The Marketplace Management page displays the product list as a line-item list or an image-table; you can easily switch between the two by pressing the display icons on the right side of the page beside the Add Product icon (indicated by a blue circle with a plus sign). You must use the image-table view — which is the default view — to add a product.
Image-Table View
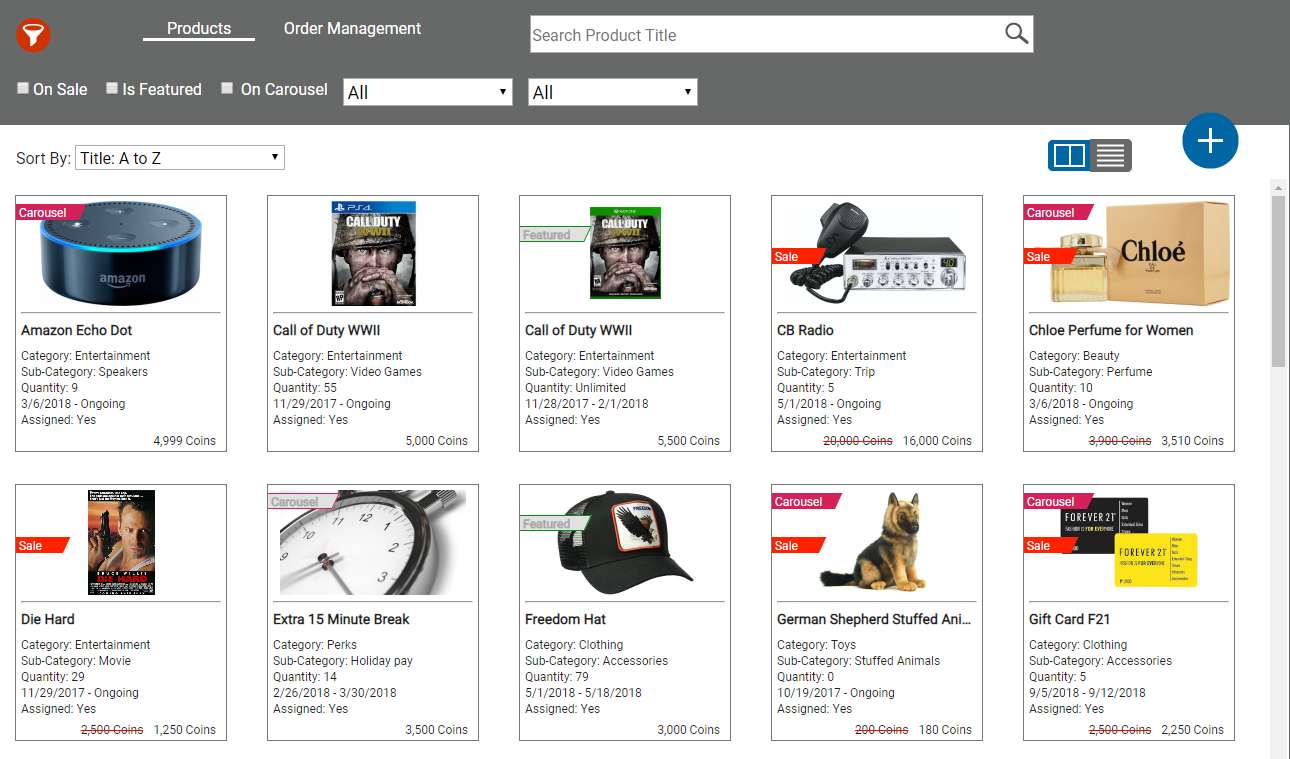
- Click Account → Marketplace Management.
- (OPTIONAL) Click the image-table view icon (indicated by two rectangles) on the right side of the page.
- Click the Add Product icon (indicated by a blue circle with a plus sign). A Product Info page will open.
- Complete the Product Info page by entering the relevant info then clicking Next.
- (OPTIONAL) Determine if and how you want the product will display on the marketplace home page. The new product will display on a product page by default. The two home page options are:
- Carousel — The highlighted items at the top of the product home page that display a larger image and more details about the product.
- Featured Product — A smaller item card that displays basic product details.
- (OPTIONAL) Put the product on sale by clicking the Put on Sale radio button, entering a percentage of discount, and determining the dates of the sale.
- Upload a product image by drag/dropping or browsing for an image file.
- Click Next.
- Assign groups that can view the product by drilling down into the different groups and pressing the thin arrow next to a group.
- Click Next.
- Review the product information on the Summary page.
- Click Save if all information is correct. You can go back to previous pages to change any information before clicking Save to finish adding a product.


