Create Survey Forms
- Click ClearVoice → Coaching Forms.
- Click the Add icon (indicated by a plus sign in a blue circle) in the upper right corner of the forms page.
- Type a Name for the form.
- (OPTIONAL) Type a Description for the form. This value appears to the right of the forms drop-down list when the form is selected.
- Click Create.
-
 Add a sub-form.
- Click the Add icon in the upper right corner of the form.
- Type a Name for the sub-form.
- (OPTIONAL) Type a Description for the sub-form. This value appears in a tool-tip when you hover over the sub-form name.
- (OPTIONAL) Type a numeric value in Position. This value determines the order of the sub-forms on the form. Leaving this field blank places the sub-form in the next available position.
- Select the Used checkbox to make the sub-form visible. If you want to hide the sub-form, leave the checkbox cleared.
- Select the Global checkbox to make this sub-form available to other forms. Global sub-forms are indicated by a globe icon when shown on a survey form.
- Click Use Global to select from a list of existing sub-forms you can use.
- Click Create.
- Repeat this step and the next two until you are finished adding sub-forms, questions, and answers to the form.
-
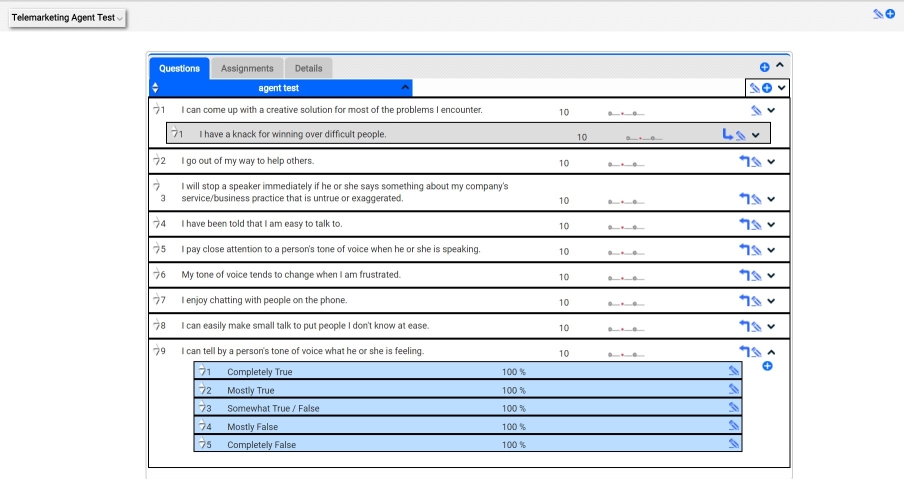
Add a question.
- Click the Add icon in the upper right corner of the sub-form.
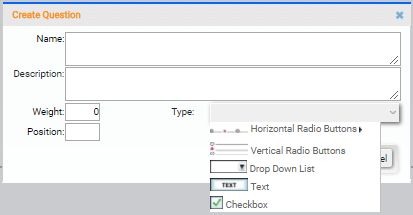
- Type a Name for the question. This value appears as the question on the form.
- (OPTIONAL) Type a Description for the question. This value appears in a tool-tip when you hover over the question on the form.
- Type a numeric value in Weight. You can use weight values to place a higher value on specific questions, thus influencing the final score. Best practice would be to assign all standard questions a weight of 1, and then give a higher number to higher-priority questions.
- (OPTIONAL) Type a numeric value in Position. This value determines the order of the questions on the sub-form. Leaving this field blank will place the question in the next available position.
- Select a question Type from the drop-down list. The question type determines how the question can be answered. The following question types are available:
- Horizontal Radio Buttons — Provides radio buttons in a horizontal line. Select from pre-populated values of Yes/No or Yes/No/NA, or select Blank to configure custom answers.
- Vertical Radio Buttons — Provides radio buttons in a vertical line using the answers you configure.
- Drop Down List — Provides a drop-down list using answers you configure.
- Text — Provides a field for free text entry.
- Checkbox — Provides a checkbox with the default value of selected.
- Click Create.
- Optional: If the question should be dependent on the question preceding it, click the right-angle arrow icon for the question (see the image at the beginning of the View and Edit Survey Forms section).
- Repeat this step and the next one until you are finished adding questions and answers to the sub-form.
-
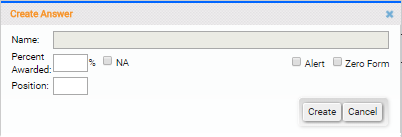
Add an answer.
- Click the Expand/Collapse icon (indicated by an angle bracket) to the right of the Edit icon for a question.
- Type a Name for the answer. This value appears as the answer on the form.
- (OPTIONAL) Type a numeric value in Percent Awarded if the form should result in a score. If the form is not to be scored, select the NA checkbox.
- (OPTIONAL) Type a numeric value in Position. This value determines the order of the answers for the question. Leaving this field blank will place the answer in the next available position.
- (OPTIONAL) Select the Alert checkbox. When this field is checked, and this answer is selected, an alert is sent to the agent's supervisor.
- (OPTIONAL) Select the Zero Form checkbox. When this field is checked, and this answer is selected, the agent receives a score of 0 for the form.
- Click Create.
- Repeat this step until you are finished adding answers for the question.
-
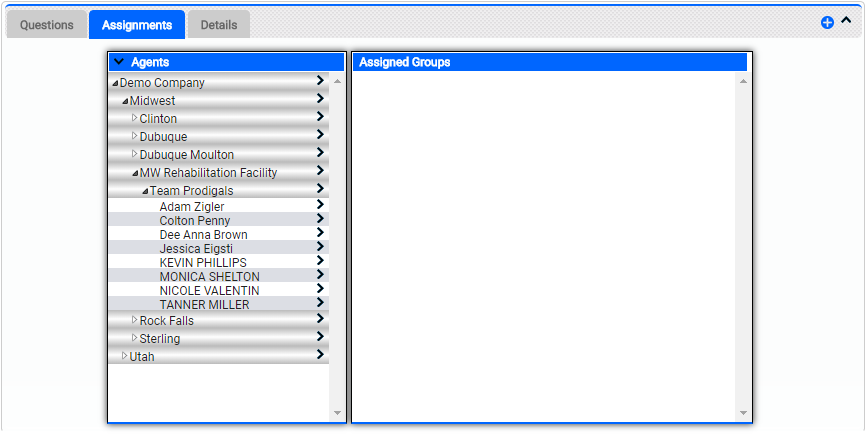
Assign the form to agents or groups.
- Click the Assignments tab.
- Click the black arrow to the left of Agents in the left section to expand all, or click the white arrow to the left of a group to drill down level-by-level to locate the agent or group for the form assignment.
- Click the black arrow to the right of the group or agent for the form assignment to move it to the right section under Assigned Groups.
- To remove an entity from the Assigned Group section, click the Delete icon (indicated by a minus sign in a blue circle) to the right of the entity.
-
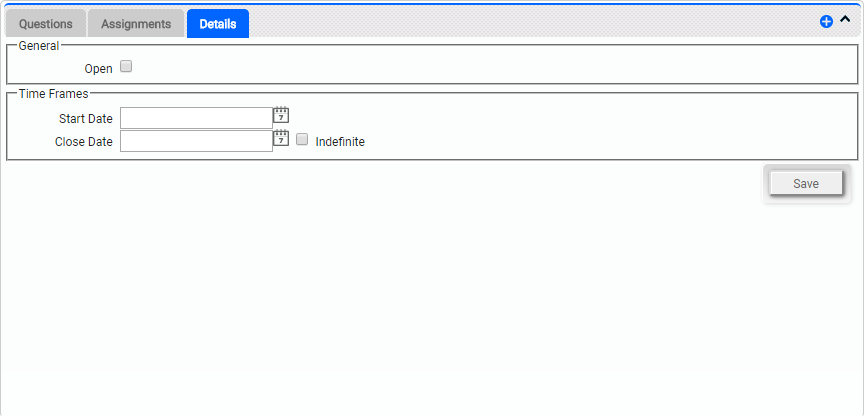
Configure survey distribution.
- Click the Details tab.
- Select the Open checkbox to make the survey available to the assigned agents or groups when they click the Surveys icon in their toolbar.
- Click the date selector (indicated by a calendar icon) to set the Start Date for the survey.
- Click the date selector (indicated by a calendar icon) to set the Close Date for the survey, or select the Indefinite checkbox if you want the survey to be open-ended.
- Click Save.