inView uses a privilege/role structure to ensure users have access to the information and functionality they need. However, there may be situations when you would like to give a user access to more data than their role normally gives them.
For example, an agent may act as a team lead while a supervisor is on leave. During that time period only, the agent needs to see information for the other agents on their team. Instead of making a new role just for that agent, or assigning an elevated role that may also include privileges the agent should not have, you can edit permissions directly for that user to provide the necessary access.
Permissions Page
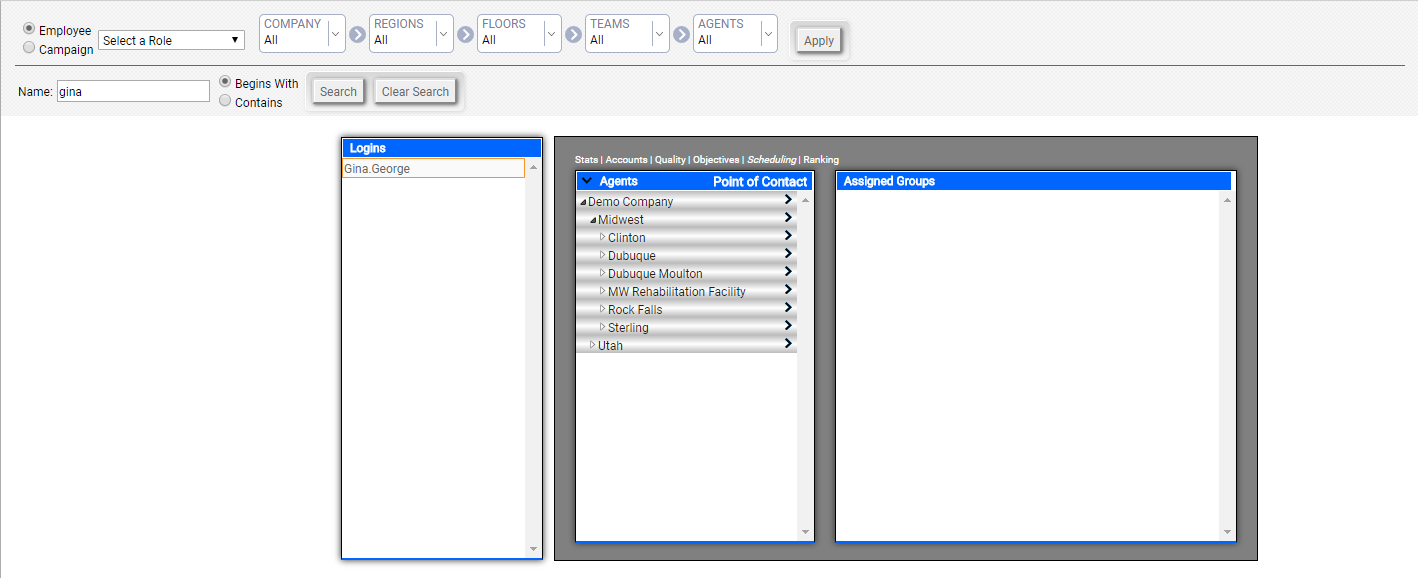
At the top of the page (Account → Permissions), you can use the filtering options to limit the list shown under Logins. For example, you can filter the list to show all employees in a specified role. You can filter, in increasingly granular detail, by either Employee or Campaign with choices appropriate to that selection. If you select Employee, you can narrow your search by Company, Regions, Floors, Teams, and Agents. If you select Campaign, you can narrow your search by Account, Campaign, Skill, and Point of Contact.
By default, the Logins list shows only active employees, but you can choose to show inactive employees instead of, or in addition to, active employees. You can also search for a specific employee by name.
Once you have narrowed the Logins list, you can click an employee to view their current access to information in each of these categories:
- Stats
- Accounts
- Quality
- Objectives
- Scheduling
- Ranking
Edit Permissions
- Click Account → Permissions.
- Use the filtering tools described in the previous section to locate the user you want to edit, or search for the user by name.
- In the Logins list, click the user you want to edit.
- Click the Expand icon (indicated by a downward-pointing angle bracket) to the left of Agents in the left section to expand all, or click the white triangle to the left of an entity in the Agents section and drill down until you reach the group or agent you want. This is the entity toward which your selected user's permissions should change.
- Click the category for which you want to view or edit permissions.
- Click the Move icon (indicated by a right-pointing angle bracket) to the right of the group or agent to move it to the right section under Assigned Groups.
- To remove an entity from the Assigned Group section, click the Delete icon (indicated by a minus sign in a blue circle) to the right of the entity.
- Repeat steps in this task if you want to edit additional permission types, or entities to which those permissions apply, for this user.


