Required security profile permissions: Users Create
You can upload multiple users at the same time either to create new users or to modify existing ones. If you use the bulk upload tool to modify existing users, it is a best practice to use the Row Changed column in the file where you indicate which users changed. Otherwise, NICE inContact considers all rows to be updated and takes much longer to upload the file.
If you want to create or edit a single user in the Central interface, see Create/Edit a New Single User.
-
Click Admin → Users → Users.
-
Click Create New → Manage Multiple Users.
-
Download the template in either Excel or Notepad.
-
If you want to create new users, click Download Template.
-
If you want to modify existing users, click Download Existing Users.
-
-
Open the file in either Excel or Notepad.
-
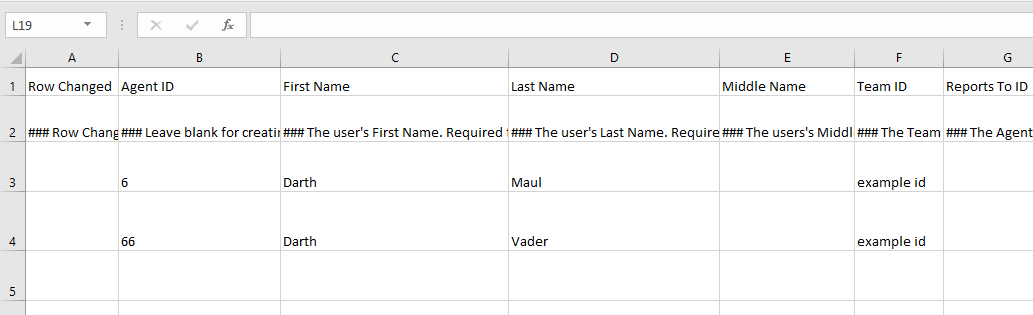
Fill in the information about each user in the rows below the header and explanation rows. Do not modify the column names, order, or data format. The columns mostly match the same fields that are available when you create a new user. Click the link for a description of what belongs in the column.
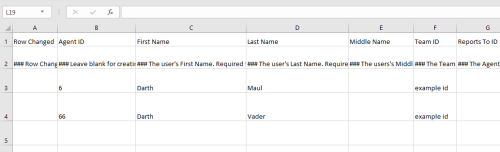
- Row Changed — Indicates to the NICE inContact system whether information in the row changed. When you put a Y in this column, NICE inContact processes the row. If you leave this column blank or put an N in it, NICE inContact does not process the row. By indicating which rows have changed, you can significantly decrease the processing time on upload.
Agent ID — The system-assigned unique ID of the user. If you are creating users, leave this blank. If you are modifying users, type the unique ID of the user. You cannot use this column to change the ID.
- First Name
- Last Name
- Middle Name
- Team ID — Use the numeric ID of the team.
- Reports To ID — Use the numeric ID of the person to whom the user reports.
- Internal ID
- Security Profile ID — Use the numeric ID of the security profile.
- Email Address
- Username
Skill ID — Type the numeric skill ID of each skill you want the user to have and the proficiency level the user has in the skill, separated by a colon. Each skill and proficiency set is delimited by a semi-colon.
Format: SkillID|ProficiencyLevel;SkillID|ProficiencyLevel;SkillID|ProficiencyLevel.
For example, you might assign a user to the following skills: 43464|3;52333|1;57393|3. The user would be able to use skill 43464, skill 52333, and skill 57393 at a proficiency level of 3, 1, and 3, respectively.
- Notes — Type any notes about the user you want in the profile.
- Chat Refusal Timeout— Type the time in seconds.
- Phone Call Refusal Timeout — Type the time in seconds.
- Voice Mail Refusal Timeout — The number of seconds of agent inactivity after NICE inContact delivers a voice mail to the agent that the system considers the interaction refused and delivers it to another agent. If you leave this blank, the profile inherits the business unitFile format associated with Microsoft Excel; may also be expressed as .xlsx default.
- Work Item Refusal Timeout — Type the time in seconds.
- Status — Whether the user is currently Active or Inactive.
- Agent Pattern ID — The dialing pattern ID you want to apply to the user.
- Time Zone — The time zone with the following format: (GMT-07:00) Mountain Time (US & Canada).
- Country
- State
- City
- Location — The location must already be in the system.
- Hire Date — Use the format MM/DD/YYYY.
- Termination Date — Use the format MM/DD/YYYY.
- Hourly Cost
- Rehire Status — Either Eligible or Not Eligible. The default is Eligible.
- Employment Type — One of Full-Time, Part-Time, Temporary, Outsource, or Other.
- Referral — Free-form referral information about the employee.
- At Home Worker — Boolean. The default value is False.
- Hiring Source
- NT Login Name
- Custom 1
- Custom 2
- Custom 3
- Custom 4
- Custom 5
- UseTeamMaxConcurrentChats — Boolean value indicating whether to apply the team default for maximum simultaneous chats to this user.
- MaxConcurrentChats — Maximum number of simultaneous chats in which this user can engage. The number must be between 1 and 8 and UseTeamMaxConcurrentChats must be False.
- WFM Schedule Notification Interval — One of 5, 10, or 15.
- Use Team Max Email Inbox Count — Boolean value indicating whether the apply the default for maximum emails in the user's email inbox.
- Maximum Email Auto-Parking Limit — Maximum number of emails the user can have in the inbox at one time. The number must be between 1 and 25 and Use Team Email Inbox Count must be False.
- Assigned Groups — The IDs of the groups to which the user belongs, delimited by semicolons.
- User Type
- Telephone 1
- Telephone 2
- CRM Username
- System Domain
- System Username
- Phones
- Shift Times to User's Timezone
- Time Display Format
- Federated Identity — Single sign-on information. You must have this feature enabled in your business unitFile format associated with Microsoft Excel; may also be expressed as .xlsx for this field to have any effect.
- SIP User — If you configured your environment to use SIPSession Initiated Protocol; used for signaling and controlling multimedia communication sessions such as voice and video calls., the SIP username of this user in the format sip:user@domain.com.
-
Save the file.
-
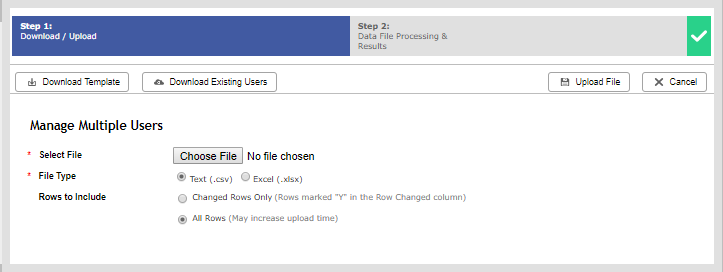
In the Select File field on the Manage Multiple Users page, click Choose File.
-
Browse for the file you created. Select it and click Open.
-
Select the File Type corresponding with the file you chose.
-
If you are creating new users, or if you are modifying existing users and chose not to use the Row Changed column, select All Rows for Rows to Include.
-
If you are modifying existing call records and chose to use the Row Changed column, selected Changed Rows Only for Rows to Include.
-
Click Upload File.
-
The Data File Processing & Results page displays a note that you should receive the results of the upload via email. Check your email to verify that no errors occurred during the upload. Resolve any errors that appear. To resolve an error, you would fix the issue in the file you uploaded, then click Back and re-upload it. If you have no errors, click Close.
If the email indicates that the batch failed, you can find details about the processing of the batch files under the Schedule Run History Report Report.