Required security profile permissions: Users Create (or Edit)
When you create new user profiles in your environment, you have the option to create new individual users or to upload multiple new user accounts at the same time. Likewise, when you edit an existing user, you can choose to modify one at a time or to modify many at the same time. This topic provides instructions for creating single users in the Central interface. See Create/Edit Multiple Users for instructions on creating or editing multiple users at the same time.
-
Click Admin → Users → Users.
-
If you are creating a new user, click Create New and select Single User.
You can also create a new user based on an existing user's profile, only modifying the fields you want to change for the new user. For instructions, see Copy a User.
-
(OPTIONAL) If you are editing an existing user, use the page links in the body of the table, or the search feature at the top, to locate the user you want to copy and click anywhere in the row corresponding to that user. Click the Edit button.
-
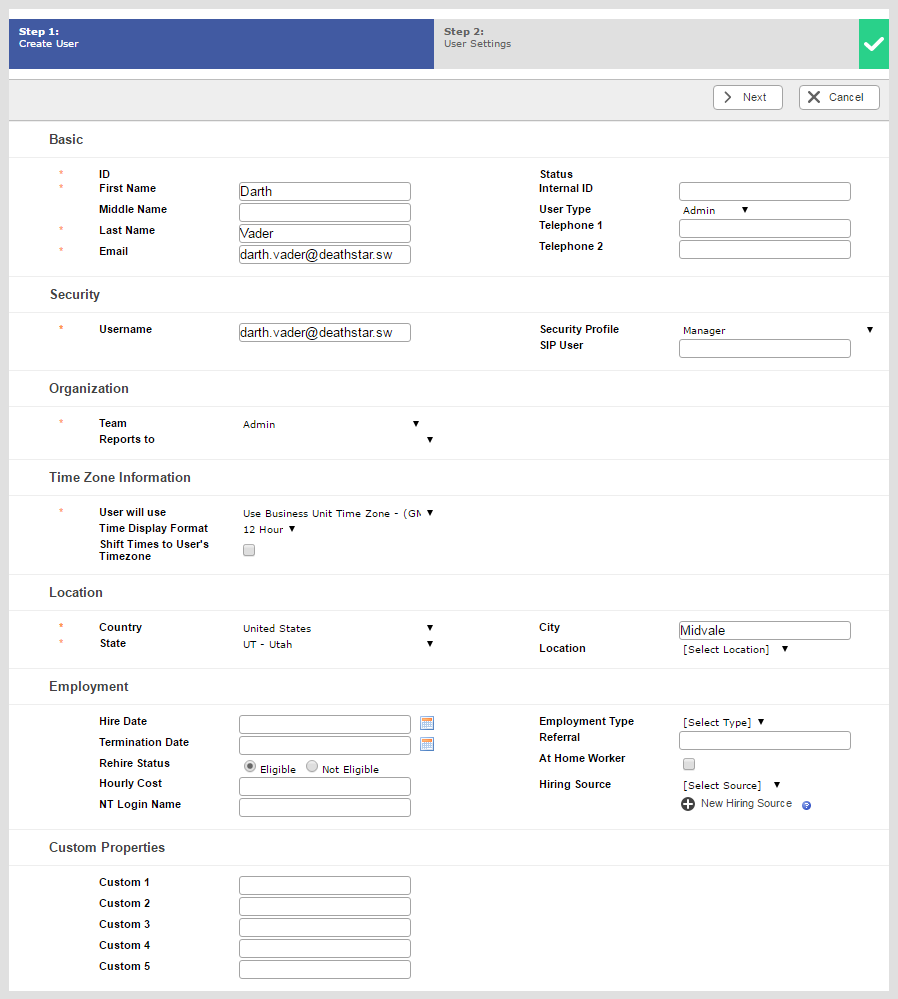
Fill out at least the required fields, indicated with a red asterisk: First Name, Last Name, Team, Security Profile, Email, Username, User Will Use (timezone), Country, and City. If the fields are available, set the password using the Password and Confirm Password fields. Fill in any optional fields you want to add to the user profile. For information about all available fields, see Create Single User: Create User Page.
- (OPTIONAL) If you are editing an existing user, and want to modify the user's system settings, click System then click Edit. Set the user's dialing pattern and restrictions per media typeA medium, such as voice, email, and chat, through which a contact connects with an intended recipient. as needed. For details about what each field does, see User Profile System Tab. Click Done.
- (OPTIONAL) If you are editing an existing user and use NICE inContact WFO, click the Groups tab to add the user to, or remove the user from, groups.
-
(OPTIONAL) If you are editing an existing user and want to write any special notes about the user, click the Notes tab, then click Edit. Write the notes in the text box and click Done.
- If you are creating a new user, click Save and Continue. If you are editing an existing user, click Done in the General tab.
-
Configure the user's system settings. Set the user's Refusal Timeouts, Default Dialing Pattern, and Contact Handling information. For details about what each field does, see User Profile System Tab.
- Click Save.
-
Click << Back to Users to return to the Users table.


