This topic explains how to understand the Users page in inView, as well as how to create and edit user accounts. These accounts are separate from your NICE inContact system and are only used within inView.
You must create and configure inView roles before you create users, since you will need to assign roles to your new users.
Users Page
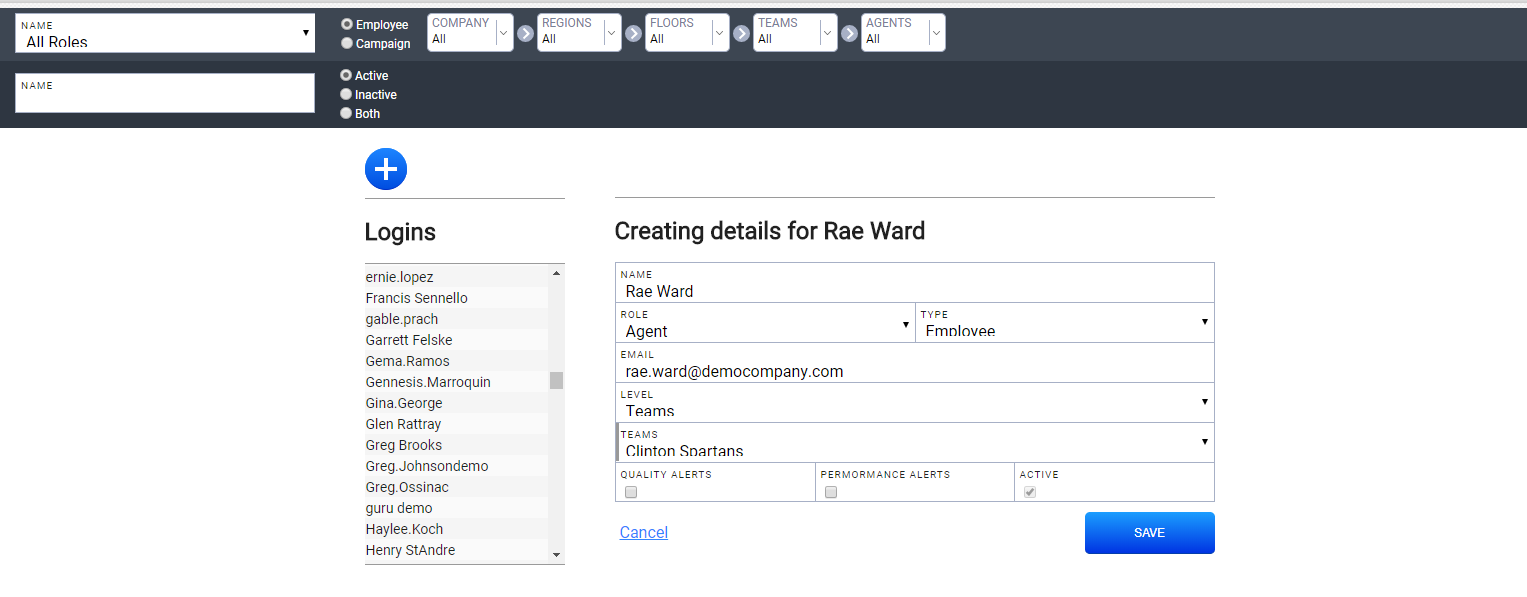
At the top of the page, you can use the filtering options to limit the list shown under Logins. For example, you can filter the list to show all employees in a specified role. You can filter, in increasingly granular detail, by either Employee or Campaign. The Logins list shows only active employees by default, but you can choose to show inactive employees instead of, or in addition to, active employees. You can also search for a specific employee by name. The following information is provided about the selected employee:
- Name
- Displays the employee's full name as others see it in the system.
- Role
- Displays the user's assigned role.
- Type
- Displays the user's employee type. Select Employee or Campaign from the drop-down list. Your selection depends on whether you organize inView reporting by employee units (like company, region, floor, and team) or by campaign-based units (like account, campaign, skill, and point of contact). This setting is used in conjunction with Level.
- Displays the user's email address.
- Level
- Displays the level of information access for the user. Select the appropriate level from the drop-down list. Values in this list vary depending on the value you selected for Type. If the employee's Type is Employee, then their Level can be Agents, Teams, Floors, Regions, or Company.If the employee's Type is Campaign, then their Level can be Point of Contact, Skill, Campaign, or Account.
- Agents (Label Varies)
- Works with Level to define the level of information access for the user. The label for this field, and the contents in its drop-down list, change based on the selection you made for Level. For example, if Level is set to Teams, then the label for this field changes to Teams and the drop-down provides a list of the teams in your system. If Level is set to Agents, this field displays only agents who have data in the system.
- Quality Alerts
- If selected, inView sends alerts when there are quality issues relevant to the agents in the user's access level.
- Performance Alerts
- If selected, inView sends alerts when there are performance issues relevant to the agents in the user's access level.
- Active
- If selected, the user is active in the system. By default, new users are set to active. When you deactivate a user, the information is no longer visible in the web portal, but is not removed from the inView database.
Create a New User
- Click Account → Users.
- Click the Add icon (indicated by a plus sign in a blue circle) to add a new user.
- Configure the user by completing the fields described in the previous section.
- Click Save.
Edit a User
- Click Account → Users.
- Use the filtering tools described in the Users Page section to find the user you want to edit.
- Click the user in the Logins list.
- Click the Edit icon (indicated by a green pencil icon).
- Make changes to the user's information.
- Click Save.


