Required security profile permissions: Skills Edit
From the Post Contact tab of a chat skill, you can configure a thank you page to appear for a contact when the chat session ends. It can optionally contain the transcript or offer a link to a web page. You can also configure dispositions for the agent to apply to the chat interaction after the chat ends.
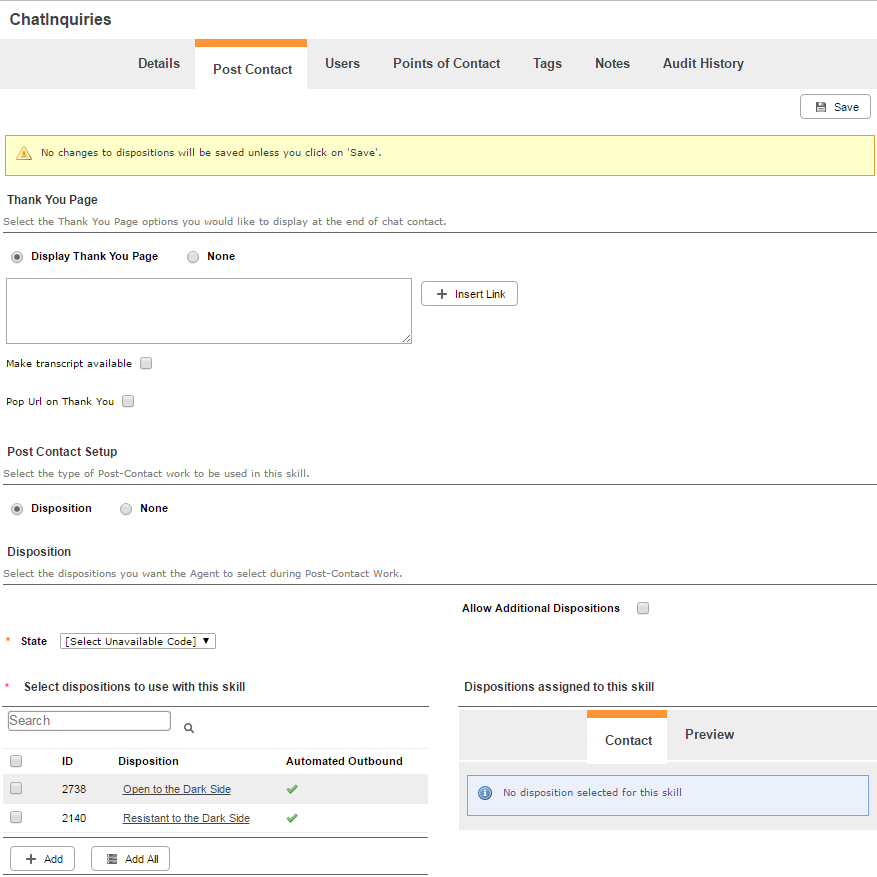
Thank You Page
You can use it to configure a thank you page that a contact sees when the chat ends.
- Display Thank You Page
-
Displays a page on the contact's screen when a chat ends. When you select this option, a text field appears. Type the text you want the contact to see in this field. You can insert a link to another page by clicking Insert Link , typing the hyperlink text in the Text to Display field and the URL in the URL for the Link field, and clicking Done.
- None
- Specifies that you do not want to display a page on the contact's screen when a chat ends.
- Make a Transcript Available
-
Available only when you select Display Thank You Page. When using V1 (ASPX), it gives contacts the option of emailing the transcript to themselves or others. When using V2 (HTML5), it gives contacts the options of downloading a .pdf transcript of the chat conversation or emailing the transcript to themselves or others. If enabled, contacts can see the version appropriate transcript options at the bottom of the Thank You page once the chat has ended. Contacts can then email a copy of the transcript by entering the recipient's address in the sender field and clicking Send. If applicable, contacts can also click Download Transcript to save a .pdf copy of the transcript.
- Pop URL on Thank You
- Opens a new website in a pop-up window in the contact's browser when the chat ends. When you select this option, the Thank You URL field appears. Type the URL of the website you want to pop up for the contact when the chat ends.
Insert Link
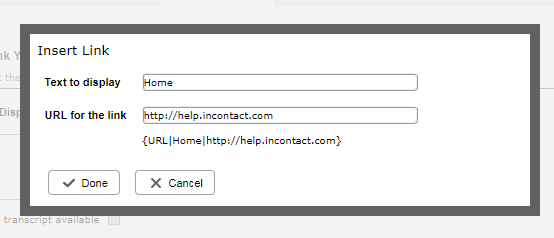
- Text to Display
- The linked text that contacts see.
- URL for the Link
- The website URL that opens when the contact clicks the linked text.
Post Contact Setup
- Disposition
- Places the agent in an after contact work state after finishing a conversation with a contact to apply a dispositionResult that the agent or system assigns to the contact when the interaction ends. to the exchange and input any required information based on the disposition, such as a callbackHolds a customer's place in queue and automatically calls the customer when they move to the front of the queue. time or a commitment amount.
- None
- When agents finish conversing with a contact, no after contact work occurs. The agent immediately becomes available to take more contacts.
Disposition
- Allow Additional Dispositions
- Available only when you select Disposition for a skillClassification used to facilitate the delivery of contacts; assigned to agents based on abilities, specialties, and knowledge type other than Personal Connection. It enables agents to select a secondary dispositionResult that the agent or system assigns to the contact when the interaction ends. after handling a contact. The secondary disposition is always optional. Agents select both dispositions from the same list but cannot select the same disposition for both.
- State
- The unavailable state applied to the agent during after call workAfter Call (or Contact) Work; state that allows an agent to complete work requirements after finishing an interaction..
- Select dispositions to use with this skill
- A table of dispositionsResult that the agent or system assigns to the contact when the interaction ends. that you can make available for agents with this skill to apply to a record after handling a contact. You must choose at least one by selecting the corresponding checkbox and clicking Add. You can also click Add All to make all visible dispositions available to agents with this skill.
- Dispositions assigned to this skill
- A table of dispositions already available for agents with this skill to apply to a record after handling a contact. You can remove dispositions by selecting the corresponding checkbox and clicking Remove. You can also click Remove All to remove all dispositions from the table.


