Re-record a Prompt from the Files Tab
The File tab displays the default folders of your business unitFile format associated with Microsoft Excel; may also be expressed as .xlsx:
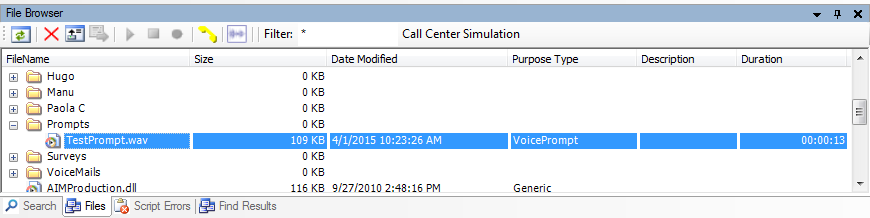
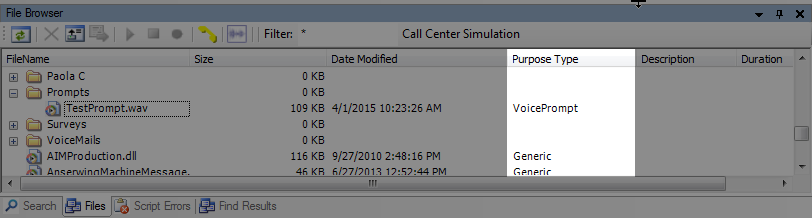
This tab holds .wavWAVeform audio file; used to store audio bitstreams such as call recordings. files generated from call logs and voice prompts. However, you will not find script files in .xml formats in the Files tab.
You may find other files types in the Files tab such as .dll or .ivr in the Files tab. Double-clicking these files will not open them the same as voice prompts or call logs. If you want to ensure that a .wav file is a voice prompt, check the Purpose Type column to see VoicePrompt or CallLog rather than Generic.
One of the common tasks performed from the Files tab is the re-recording of existing prompts. You cannot record new prompts from the Files tab. To record over an existing prompt, use the icons in the Files tab toolbar:

The following list describes the function of each icon:

Refresh. Updates the content in the Files tab.

Delete. Removes a .wav file from the Files tab.

Upload File(s). Adds a new file to the Files tab.

Commit File Info Changes. Applies any updates made to the Protected or Weblink properties in the Properties tab.

Play. Plays the selected .wav file in the default media player.

Stop. Stops a selected .wav file that is currently playing.

Record. Records over a .wav file through the phone number entered in the Prompt Manager Login window.

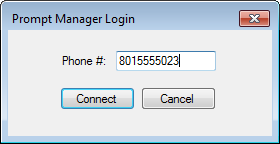
Connect Prompt Manager. Opens the Prompt Manager Login window, enabling you to supply a phone number and then either play a selected prompt or record over an existing prompt through that phone's handset.

Edit Wave. Makes changes to an existing .wav file.

Filter. Narrows your search based on your entry, including file type and name.
You will notice that initially, some of the icons are grayed-out. The reason for this is because they are enabled only when you are in the recording process. So, once you have begun re-recording a prompt, you will see them become available. For example, the Commit File Info Changes icon is, by default, grayed-out.

To enable it, single click a file in the Files tab and then make a change to either the Protected or Weblink properties in the Properties tab:
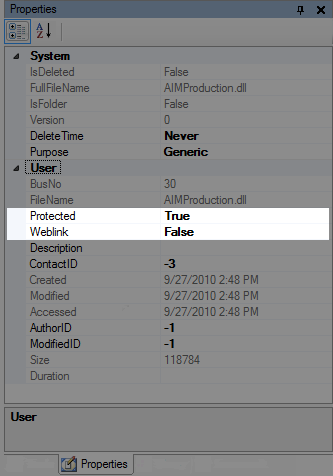
When you see the icon become enabled, click it to apply the changes you made in the properties.
The Files tab toolbar contains many of the same icons that you would also find in the Prompt Manager, which is accessible by double-clicking certain actions such as PLAY and MENU in your script.
To listen to .wav files in the Files tab, click the Connect Prompt Manager icon in the toolbar, which displays the Prompt Manager Login window. Assuming the phone number you type in this field is valid, when you click Connect, the phone associated with the number will start ringing, and you will pick up the receiver.
You will not hear anything over the receiver because you have not selected a .wav file that you want to play. So, click a voice prompt and click the Play icon, and you will hear the prompt through the phone. When the prompt is done playing, you can click another prompt to play, and so on. You do not have to connect to the Prompt Manager each time you want to hear a different prompt. Any prompts that you hear over the phone can be re-recorded using the other icons in the Files tab toolbar.
-
 (OPTIONAL): Show the Files tab if hidden
If the Files tab does not appear in the interface, then you will need to add it to the interface.
-
Click View
-
Select Files and the Files Tab will display in the interface.
-
-
Navigate to the .wav file you want to record over (click it just once to highlight it).

If you double-click the file, it will play in your default media player. The best practice is to listen to a file before you record over it to make sure you have the correct file.
-
Click the Connect Prompt Manager icon:
-
When the Prompt Manager Login window appears, type the phone number of the phone that you want to use to listen to or record over the prompt:
-
Click Connect.
-
When the phone associated with the phone number you entered rings, pick up the handset.
-
(OPTIONAL): Listen to the existing prompt.
Listen to the existing prompt if you are not sure of its contents or if you just want to make sure that you want to change it.
-
Click the Play icon in the Files tab toolbar:
-
The file will play over the handset of the phone number you entered in Step 5.
-
-
If you want to record over the existing prompt, click the Record icon:
-
When you hear a beep over the handset, begin speaking clearly to record over the existing recording.
-
When you are done recording, click the Stop icon:
-
Without hanging up the phone, click the Play icon to listen to the recording:
-
If the recording is acceptable, hang up the receiver. If it is not acceptable, click the Record icon to record again.
Remember that you do not have to hang up the phone receiver to listen to another prompt or even record over another .wav file. If you want to hear another prompt, just click it once to highlight it, and then click the Play icon. If you want to record over that prompt, click the Record icon. You can listen to or record over as many .wav files as you need.


