Required security profile permissions: Points of Contact View
Agents can participate in chat sessions as a medium of communication (also known as a channel) in your contact center. Customer Chat Interface is a chat client that can be added to a web page controlled by your organization and used by customers to initiate a chat session.
This topic explains how to add Customer Chat Interface to a web page. You can configure it as either an embedded or pop-out window.
Customer Chat Interface must be enabled by your account manager before you begin to use it. This chat client is just one element of the chat channel. Configuring chat for your contact center is a multi-step process. For more information, see Chat Overview.
Embed Customer Chat Interface in a Web Page - V2 (HTML5)
-
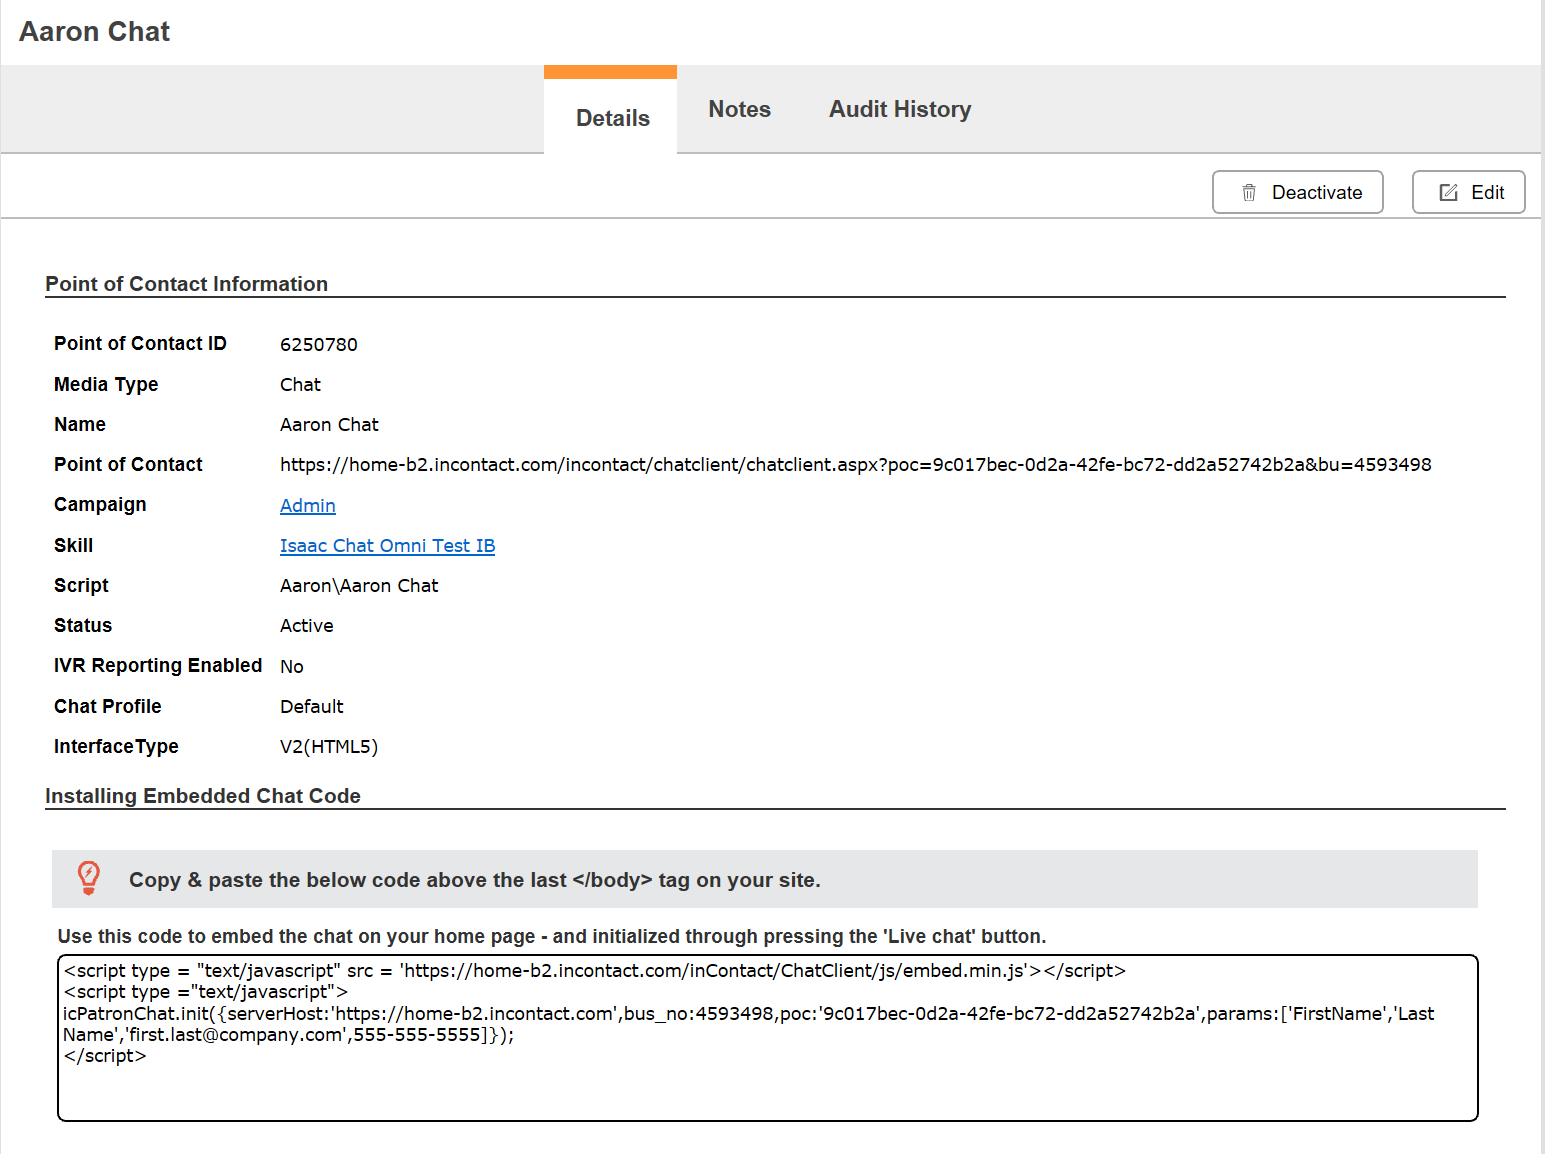
Click Routing → Points of Contact.
- Select an existing or create a new point of contact.
- Copy the body of code located at the bottom of the page.
- Paste the copied text to the end of the <body> section of your web page.
Add a Customer Chat Interface Pop-out Window to a Web Page - V1 (ASPX) and V2 (HTML5)

-
Click Routing → Points of Contact.
- Select an existing or create a new point of contact.
- Copy the Point of Contact URL.
- Add these lines of code to the end of the <body> section of your web page. Replace the highlighted text with your URL.
<script type = "text/javascript" >
var popupPatronChat = function() {c4.incontact.com/inContact/ChatClient/ChatClient.aspx?poc=815f0de7-f189-4f6a-b272-4ffbcf80c0b&bu=50&P1=First Name&P2=Last Name&P3=first.last@company.com&P4=555-555-5555;window.open(url, 'icPatronChatWin;, 'location=no,height=630,menubar=no,status-no,width=410', true);
};
</script>


