Required security profile permissions: Call Suppression Create
After you create a call suppression script, you can begin adding records to the call suppressionTemporarily skips a contact when using the outbound dialer. list. When you do so, you must specify the value that the record or records contain in the calling list for the column that you specified in the script. You must also select a start and end time for Personal Connection (PC) to suppress calls or messages to that record or records.
- If you are creating new call suppressionTemporarily skips a contact when using the outbound dialer. records and have not already done so, set up a call suppression script for the skillClassification used to facilitate the delivery of contacts; assigned to agents based on abilities, specialties, and knowledge you want to suppress calls or messages.
-
Click Personal Connection → Lists → Call Suppression.
-
Click Create New → Manage Multiple Records.
-
Open the template in either Excel or Notepad.
-
If you are creating new call suppression records, click Download Template.
-
If you are modifying existing call suppression records, click Download Existing Records.
-
-
Open the file in either Excel or Notepad.
-
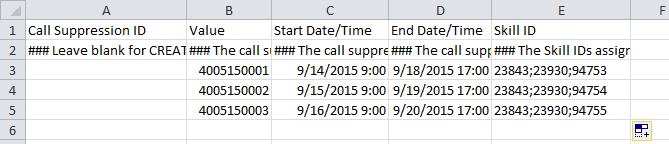
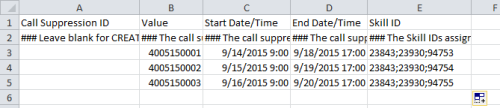
In the rows below the header and explanation rows, fill in the information about each record.
-
If you are modifying existing records and want to decrease the upload time of this table, create a new column called Changed and add a Y to each row you modified and want to re-upload.
-
Save the file.
-
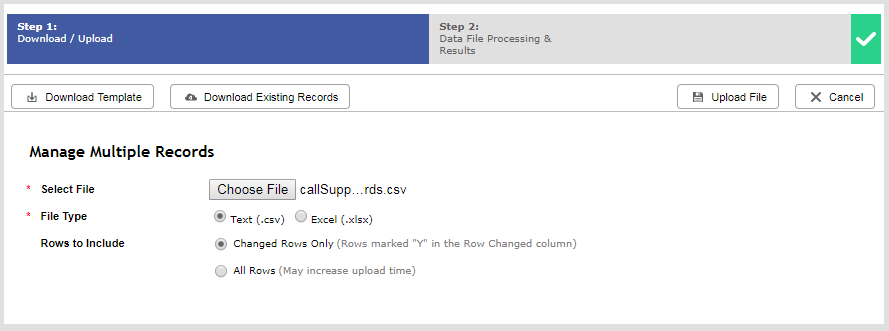
In the Select File field of the Manage Multiple Records modal, click Choose File.
-
Browse for the file you created. Select it and click Open.
-
Select the File Type corresponding with the file you chose.
-
If you are creating new call suppression records, or if you are modifying existing call records and chose not to use the Change column, select All Rows for Rows to Include.
-
If you are modifying existing call records and chose to use the Change column, selected Changed Rows Only for Rows to Include.
-
Click Upload File.
-
Resolve any errors that appear in the Data File Results page. For example, the skill IDs for the records might be invalid. To resolve that, you would fix the skill IDs in the file, then click Back and re-upload the file. If you have no errors, click Close.