Required security profile permissions: Do Not Call List Edit
If you choose not to manage your do not call (DNC) list automatically through dispositionsResult that the agent or system assigns to the contact when the interaction ends., you can upload a DNC list instead. This file can be a comma- or tab-delimited list in a .csvComma-Separated Values file; used to store tabular data such as a spreadsheet or database. or .txt file or an Excel (.xls or .xlsx).
- If you have not already done so, create a DNC list.
-
Click Personal Connection → Lists → DNC.
-
Locate the group to which you want to apply the DNC list. Click the group to open it. You can also create a new group.
-
Click Select File.
-
(OPTIONAL) Select the Consolidate Groups checkbox if you want the records in your DNC list to exist only in this group.
-
Select the Upload New radio button if you want to select a new list from your computer's hard drive. Select Select Existing if you want to use a list you already uploaded.
-
If you selected Upload New, click Choose File and locate the file on your hard drive. Select it and click Open. Click Next.
If you selected Select Existing, click Browse and locate the file on the list. Select it and click OK. Click Next.
-
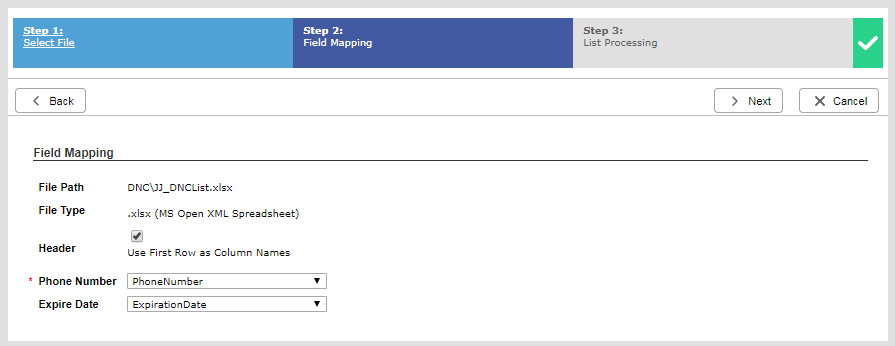
If you uploaded a DNC list with a heading row, click the Header checkbox. The platform automatically matches the column headers you created to the fields. Verify that the Phone Number and, if your calling list has an expiration date column, Expire Date fields, are correctly mapped to your DNC list.
-
Click Next.
-
The List Processing page appears and displays the status of your upload. When the process completes, click Done.


