This topic explains how to install and configure the Skype for Business Connector application.
For more information, see Skype for Business Connector Overview.
These items must be in place prior to installing Skype for Business Connector.
- Skype for Business (Lync) Server (min version 2013).
- UCMA Runtime 5.0 installed.
- Skype for Business Connector must be enabled for your
- Create a Trusted Application in Skype for Business Server.
- Publish Topology Manually in Skype for Business Server.
- Create a Certificate in Skype for Business Server Using MMC.
- Export a Certificate in Skype for Business Server Using MMC.
- Import a Certificate in Connector Machine using MMC.
- Download the Skype for Business Connector by clicking
- Follow the instructions in the Read Me file included in the download package to install the application.
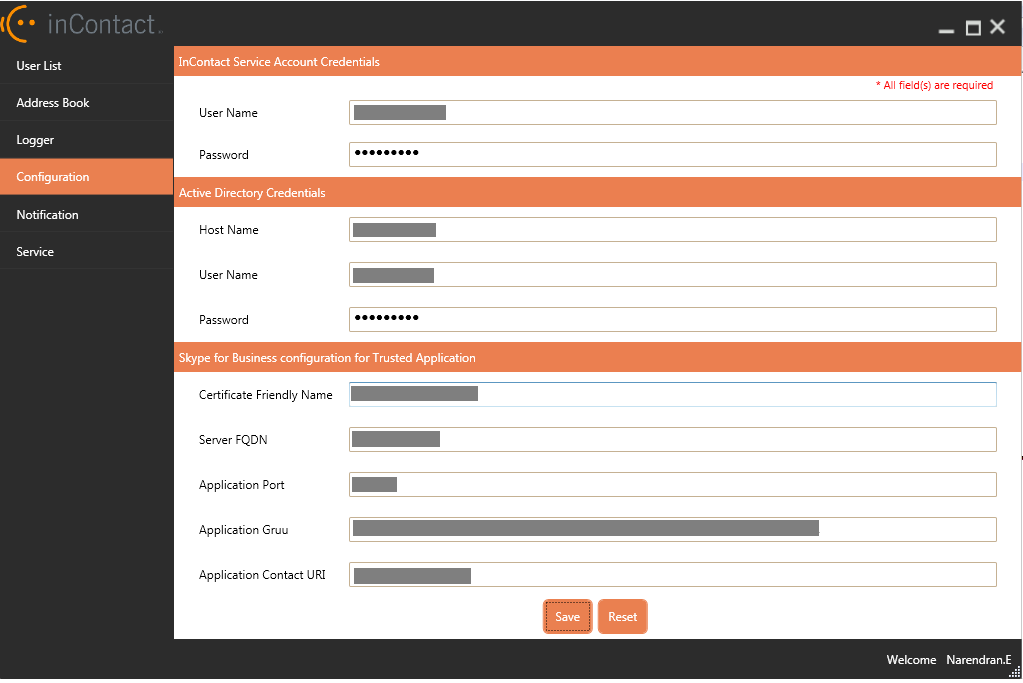
- Open the Skype for Business Connector application. Click Configuration in the side menu.
-
Type the appropriate value in each field according to the descriptions on the Configuration Page.

-
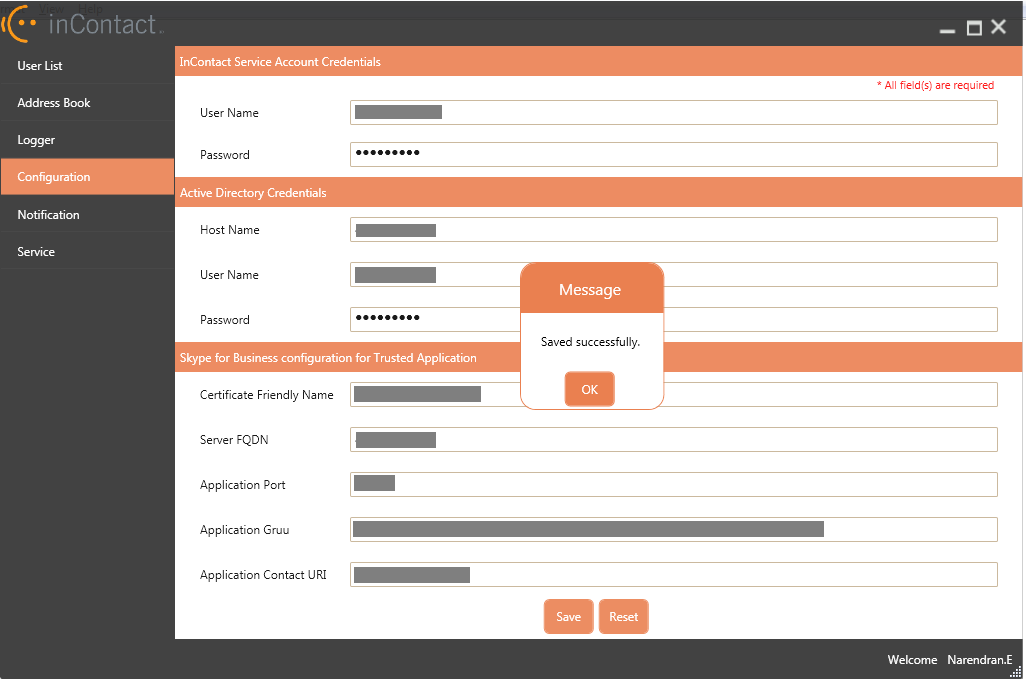
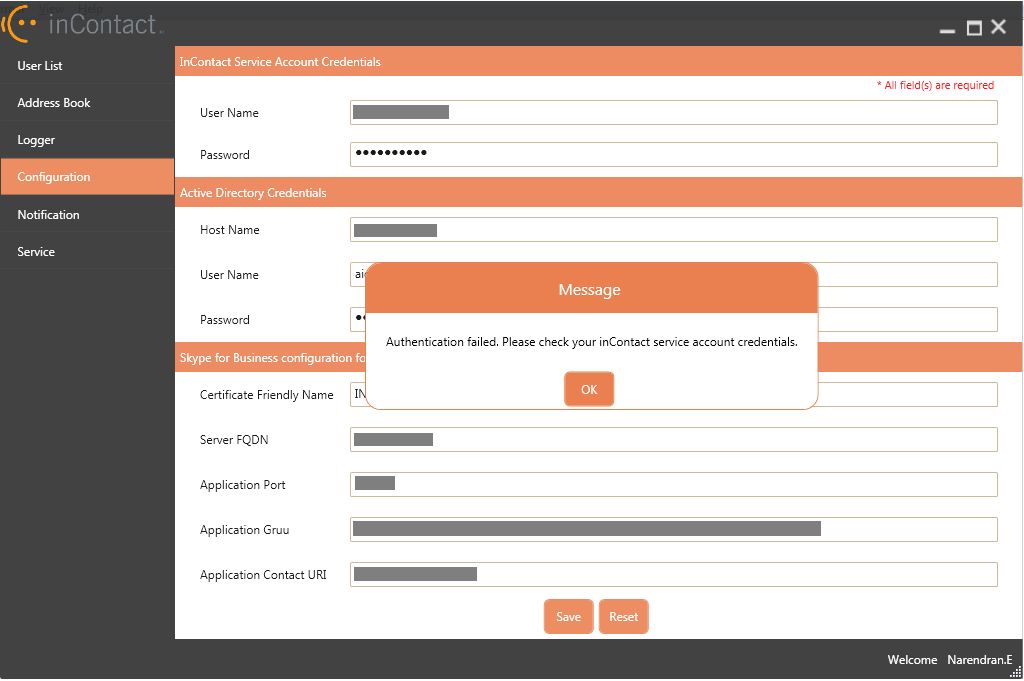
Click Save or type [CTRL] + [S] to save the configuration settings.
If you entered the correct information, you receive a message that says your changes saved successfully.

If you entered incorrect credentials, you receive a message that says you entered invalid information.
If you receive an error message telling you the Skype for Business Connector feature is disabled for your business unitFile format associated with Microsoft Excel; may also be expressed as .xlsx, contact your NICE inContact account manager for assistance.

- When your settings save successfully, click OK.
- Configure logging.
- Configure notifications.
- Import a user list.
- Create an address book.
- Start the service.